Tuesday, November 26, 2013

Mess Up Project Update

I started my little brilliant project of wrecking the house last Saturday. I never realized it was this difficult. The mere trying-to-figure-out-how-to-make-my-ideas-come-to-life was exhausting on its own. I was there, looking blankly at the furniture and the only solution I can think of was to throw everything.hehe Someone must invent a superlative term for the word “fully-furnished” (or should I educate the MIL about being minimalist). Anyway, I decided I cannot make the tweaking until after Christmas, I must give way and allot space for the tree for the season.


the tree needs more lights and ornaments, I know 

garland set-up at the room entrance. the little girl hands me the ornaments while the boys were watching the boxing match

So there, the tree is set. It’s only a temporary set-up though. The family will still have to dress it up more. I just started it so the little girl would be preoccupied during the Pacquiao fight and give her tatay an uninterrupted watching time (but not actually, he had the little boy.hihi) 

Going back to the project, I am proud to present mi esposo’s contribution (lagot ka sa mommy mo). I requested him to adjust the curtain rod to emphasize the window. My research (see, my wrecking project is based on facts) showed that we must give enough allowance between the curtain and the window. This will allow more light and air to come inside the house. This will also make an illusion of a framed window, thus will define your windows more.


source
The one in the house was a no-no


original position of the rod


Mackoy at work. I was able to hire that machong handyman for free, all I did was to marry him.ahihi


See the difference? The book says, it must be that (right rod) high and wide. I'm excited already. 


There, it’s adjusted (the left side was adjusted too, of course). All I have to do is to sew the fabric for the curtain. Actually, I will only cut the fabric (I never am a good sewer). I wanted to pass the sewing part to my SIL but I am not sure if she will be able to return it to me at least before the year ends, so I think I have to rely on the nannies. I will ask them to hand sew it for me.

I hope we’ll be able to put everything together before my PIL comes back from the US (or they’ll notice the curtain rod mess up, palo kami!).

Monday, November 25, 2013

DIY Stage Backdrop

Did it come to you that you’re in a budget but was trying very hard not to show it? That’s our situation during Dos’ birthday party. And 1 of the big/small (BIG, being it’s where the guests look at, almost the entire duration of the party and SMALL being it’s only their peripheral vision who’s actually in use) detail that esposo and I took and actually fought about was the stage backdrop. 1. Renting a whole styro-backdrop was way out of the budget and too impractical (it ranges from P6-8K, plus looks a little messy in our opinion) 2. The tradition tarpaulin backdrop was too plain for P3k (5x3 customized tarpaulin with 2 balloon pillars), I thought. What I wanted to come up with was a backdrop that 1. Reusable; 2. Refreshing; 3. Unique; and 4. Cheap but not obvious. 

During the process of planning, I was challenged by the esposo: “I’m sure the cost for that DIY would be as much as Kim’s (party planner) quotation, just give it to her, no hassle”. Good thing I thought of that before him, I already did the math and was able to convince him (or was it my tears that convinced him). Hehe

My initial idea was just to use a fabric as backdrop and simply cut-out Dos’ name on a styro but since the esposo made this official logo (I asked him to make this for the invitation but wasn’t able to incorporate it in the final layout), I decided to use the design for the stage instead.


Now, for the tutorial.

We bought this Styrofoam at Divisoria for P35/piece we bought 2 pieces for the name and the ball. But later found out that it was only enough for the ball so we bought 1 piece at Pandayan Bookshop for P45 #SayangDinAngSampungPisoAh. 

For the ball, esposo improvised a huge compass using 2 ballpens and a ribbon. He tied the end of the ribbon to the end of the pens (we wanted a 3’ high ball and there were no circle in that height around the house), it was so smart of him I tell you.


He cut the ball using a kitchen knife. It was easier to hold and to cut and produced only a little styrosnow.


He simply traced the finished product for the other half of the ball.


The letter cut out was really a challenge because no one in the family can make good letterings. We tapped an architect friend but due to schedule differences, I opted to try it myself instead. I relied on pure math and not skill and used trial and error method. We still used Bodoni MT Black Font (same as LA Laker’s Jersey Font) to be consistent with the rest of the printables. I’m glad that Dos' name were only 3 letters and easy ones at that. I was able to finish the letterings but waited for esposo’s approval before cutting it.


The next day, esposo volunteered to cut it but found my letters messy and difficult to trace so he made his version at the back of the same styro. He’s such a credit stealer and I love him for that.hehe


He again, used a knife to cut it and was careful enough to use a ruler to guide him.


He also layed-out and cut number 1 using the scraped foam. After cutting everything, he painted it using a water-based paint. Apparently, all water-based paints are compatible with styrofoam. He used latex water based paint specifically.


He double coated every sides of everything.


The fabric was brought at Divisoria too. The yellow one was at P35/yard (we got all 3yards for P100) and purple for P20/yard (we got 2yards for P15/each, tapat na po). We only planned to use the yellow fabric but bought the purple anyway (in case). We asked my SIL to sew the ends with a specific instruction of making a room for a rod. But after finalizing the invitation, I thought of asking her to the attached purple fabric at each side as similar to the invitation design. She ended up using only half of the yellow fabric.

* Invitation also DIY using Microsoft Paint. At the left was the draft and at the right was the final invitation. We eventually decided for a joint celebration but focused on the little boy more.
For the balloon pillar, we also bought two colors each of 5’ and 260s balloons at Divisioria (I forgot the retail price, but I’m sure it was less than P500 for all). I burnt my eyebrows in learning how to DIY the balloon pillar but Kim was really very kind to help out, actually her staffs totally did it for me. And apparently, you will also need 11’ balloon in making a pillar (sorry, just a very trying hard fella here), but look they were able to pull it off nicely by adding their own balloons. I couldn't thank them enough.

The esposo attached the styrofoam cut-outs together by using toothpick. He then attached the foam to the fabric with the use of straight pin. We bought 3 mat pins at SM at P12/mat (I'm sure it's cheaper outside the mall) but only used about half of the 1st mat.

This was how the stage backdrop looked when pulled together. I love how the light radiates during daytime.


And still as vibrant at night.


Cost breakdown:

Styrofoam (P35+35+45) = 115
Paint = 200*
Fabric (P100+30) = 130
Balloons = 500*
Mat pin (P12/mat) = 36

Total = P981
*approximation

My original budget was only P800 (the cost of a 5x3' tarpaulin print-out). See, it was a little over my estimated budget but it was way too gorgeous against the P3,000 traditional, simple and boring tarpaulin backdrop. #BaonNaBaon And just to share my response to esposo’s challenge during our argument: “Yes, the cost might be the same, but with that amount, all the other small details will be covered”. Which was very true, the extra balloons were used as cake arch and entrance decor. The paint was used in the signage. And the fabric is currently in the process of curtain conversion.

Hushie, threeeee poooinnnnnnnnnntsssss! :)

Friday, November 22, 2013

PROJECT: Home Improvement - ON

Mi familia currently lives in a house owned by my in-laws. After we got married, my PIL was so kind to offer their house for us to live-in while we are still searching for a house of our own. Since, they’ll also be transferring to QC that time, it would be perfect to leave their house with their son. I initially opposed to that plan. I suggested we rent a place instead because I thought I can move freely when I’m at my own house but later on agreed for practical reason. We were blessed to acquire house and lot during our first few months together, but since it needed a lot of renovation, we decided to sell it after a year. We used the proceeds to buy a residential lot in a prime village within the area. Then we planned the construction, we actually had the design and was finalizing some details when we got pregnant. You know the superstition, so no house construction took place. When I gave birth, we were forced to transfer to my mama’s so she could look after Uno. We technically maintained 2 houses, no need to add another just yet. When we thought Uno can be trusted to a yaya and we can start our little house construction project, we got pregnant again.

My in-laws house was in perfect fit when I came in, fully furnished and all. Although it was not actually in my taste and style, I didn’t dare touch anything (see that’s why I wanted to rent). We always thought the set-up was only temporary. But come to think of it, we’ve been living there for more than 5 years now. I think everybody needs to accept the fact that 5 years isn’t temporary.

So now, I’m starting my little project which I’m calling “Mom, I mess up your house”. It's a home make-over project of some sort which I think will turn the house far from how it used to be. I’ll incorporate my own style, add more color and pattern that will depict the age of the present dwellers. Shhh, don’t tell her I said the last part.hihi

I’ll focus on the living area 1st and I’m setting a budget of P5,000 (which is still not available). Let’s see where it would take me. But as I have said, the house is fully furnished, so I just have to squeeze my creative juices ala Martha Stewart and improve whatever is already there (which I think would really mess up everything.hehe). I hope my MIL would still trust me with her house after this. Nyay!   

Thursday, November 21, 2013

Connections

My phone's wifi button has been disabled for unknown reasons. I blame it to the software update, mi esposo could not do anything but to concur with me. That made me so disconnected to the social media world but thanks to my "IT Expert" lover he was able to make "ways" for me. *evil grin*

As I logged on my FB account, I saw he liked an article which surprised me. I'm glad he's reading parenting articles now (I thought he's only interested in dog breeds and/or bikes. He's becoming human, hooray!). Although the title says ...For Dads and Daughters, I read it and it touched my heart and made me cry, oh, the crying thing must be the effect of the full moon.hehe Nevertheless, this article is worth sharing. So here, enjoy and I'm sure even Moms can do these to their children.

PS: Honey, don't worry, you've done most of these (#1 special mention. ahihi). J

1. Love her mom. Treat her mother with respect, honor, and a big heaping spoonful of public displays of affection. When she grows up, the odds are good she’ll fall in love with and marry someone who treats her much like you treated her mother. Good or bad, that’s just the way it is. I’d prefer good.

2. Always be there. Quality time doesn’t happen without quantity time. Hang out together for no other reason than just to be in each other’s presence. Be genuinely interested in the things that interest her. She needs her dad to be involved in her life at every stage. Don’t just sit idly by while she add years to her… add life to her years.

3. Save the day. She’ll grow up looking for a hero. It might as well be you. She’ll need you to come through for her over and over again throughout her life. Rise to the occasion. Red cape and blue tights optional.

4. Savor every moment you have together. Today she’s crawling around the house in diapers, tomorrow you’re handing her the keys to the car, and before you know it, you’re walking her down the aisle. Some day soon, hanging out with her old man won’t be the bees knees anymore. Life happens pretty fast. You better cherish it while you can.

5. Pray for her. Regularly. Passionately. Continually.

6. Buy her a glove and teach her to throw a baseball. Make her proud to throw like a girl… a girl with a wicked slider.

7. She will fight with her mother. Choose sides wisely.

8. Go ahead. Buy her those pearls.

9. Of course you look silly playing peek-a-boo. You should play anyway.

10. Enjoy the wonder of bath time.

11. There will come a day when she asks for a puppy. Don’t over think it. At least one time in her life, just say, “Yes.”

12. It’s never too early to start teaching her about money. She will still probably suck you dry as a teenager… and on her wedding day.

13. Make pancakes in the shape of her age for breakfast on her birthday. In a pinch, donuts with pink sprinkles and a candle will suffice.

14. Buy her a pair of Chucks as soon as she starts walking. She won’t always want to wear matching shoes with her old man.

Photo Credit :: Danielle Rocke Toews
15. Dance with her. Start when she’s a little girl or even when she’s a baby. Don’t wait ‘til her wedding day.

16. Take her fishing. She will probably squirm more than the worm on your hook. That’s OK.

17. Learn to say no. She may pitch a fit today, but someday you’ll both be glad you stuck to your guns.

18. Tell her she’s beautiful. Say it over and over again. Someday an animated movie or “beauty” magazine will try to convince her otherwise.

19. Teach her to change a flat. A tire without air need not be a major panic inducing event in her life. She’ll still call you crying the first time it happens.

20. Take her camping. Immerse her in the great outdoors. Watch her eyes fill with wonder the first time she sees the beauty of wide open spaces. Leave the iPod at home.

21. Let her hold the wheel. She will always remember when daddy let her drive.

22. She’s as smart as any boy. Make sure she knows that.

23. When she learns to give kisses, she will want to plant them all over your face. Encourage this practice.

24. Knowing how to eat sunflower seeds correctly will not help her get into a good college. Teach her anyway.

25. Letting her ride on your shoulders is pure magic. Do it now while you have a strong back and she’s still tiny.

26. It is in her nature to make music. It’s up to you to introduce her to the joy of socks on a wooden floor.

27. If there’s a splash park near your home, take her there often. She will be drawn to the water like a duck to a puddle.

28. She will eagerly await your return home from work in the evenings. Don’t be late.

29. If her mom enrolls her in swim lessons, make sure you get in the pool too. Don’t be intimidated if there are no other dads there. It’s their loss.

30. Never miss her birthday. In ten years she won’t remember the present you gave her. She will remember if you weren’t there.

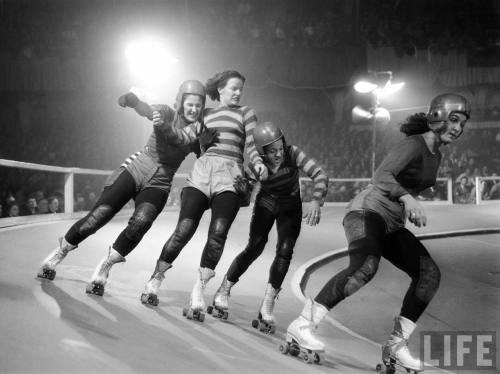
31. Teach her to roller skate. Watch her confidence soar.

32. Let her roll around in the grass. It’s good for her soul. It’s not bad for yours either.

33. Take her swimsuit shopping. Don’t be afraid to veto some of her choices, but resist the urge to buy her full-body beach pajamas.

34. Somewhere between the time she turns three and her sixth birthday, the odds are good that she will ask you to marry her. Let her down gently.

35. She’ll probably want to crawl in bed with you after a nightmare. This is a good thing.

36. Few things in life are more comforting to a crying little girl than her father’s hand. Never forget this.

37. Introduce her to the swings at your local park. She’ll squeal for you to push her higher and faster. Her definition of “higher and faster” is probably not the same as yours. Keep that in mind.

38. When she’s a bit older, your definition of higher and faster will be a lot closer to hers. When that day comes, go ahead… give it all you’ve got.

39. Holding her upside down by the legs while she giggles and screams uncontrollably is great for your biceps. WARNING: She has no concept of muscle fatigue.

40. She might ask you to buy her a pony on her birthday. Unless you live on a farm, do not buy her a pony on her birthday. It’s OK to rent one though.

41. Take it easy on the presents for her birthday and Christmas. Instead, give her the gift of experiences you can share together.

42. Let her know she can always come home. No matter what.

43. Remember, just like a butterfly, she too will spread her wings and fly some day. Enjoy her caterpillar years.

44. Write her a handwritten letter every year on her birthday. Give them to her when she goes off to college, becomes a mother herself, or when you think she needs them most.

45. Learn to trust her. Gradually give her more freedom as she gets older. She will rise to the expectations you set for her.

46. When in doubt, trust your heart. She already does.

47. When your teenage daughter is upset, learning when to engage and when to back off will add years to YOUR life. If you succeed in doing this, tell me how.

48. Ice cream covers over a multitude of sins. Know her favorite flavor.

49. This day is coming soon. There’s nothing you can do to be ready for it. The sooner you accept this fact, the easier it will be.

50. Today she’s walking down the driveway to get on the school bus. Tomorrow she’s going off to college. Don’t blink.

Photo Credits can be found at the bottom of Michael’s original post.